This post is sponsored by K12.
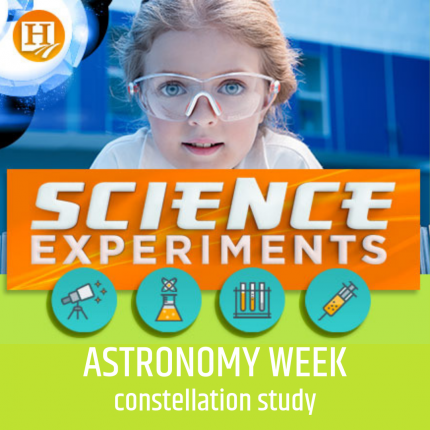
Many students agree that astronomy is one of the most fascinating aspects of science! The wonder of the universe with its many galaxies and innumerable stars is fairly insatiable. Thankfully, as homeschoolers, we can explore whatever subject we like and what better way than to try a project or experiment? If you are looking for a STEM project for your homeschooler, we have a challenge for every age level: elementary, middle school, and high school.
Elementary: A Constellation Jar
This project is simple and fairly fast, and yet, the outcome is super fun. Your kids will likely be able to handle a lot of the steps themselves, which is always something I look for in a science project. We all know hands-on learning is the best, and kids always want to do it themselves anyway. This is a win-win for everyone!
Supplies:
- Glass jar (such as a mason jar or a clean pickle jar)
- Aluminum Foil
- Paper Clip
- Marker or pen
- Constellation chart (such as from this really fantastic website!)
- Double-sided tape
- Scissors
- An LED light or preferred battery-operated light.
Process:
- Roll the foil around the width of the jar, making sure it overlaps by half an inch. With the scissors, cut the remaining foil.
- Smooth out the measured section of foil on the table. With your constellation chart, lay it over the foil and poke holes into the foil to match the star patterns.
- Taking the marker or pen, connect the constellation shapes on the foil. Make as many stars and constellations as desired.
- With the double-sided tape, tear off a few pieces and stick them on the outside of the jar.
- Wrap the foil around the jar with the constellation-side facing out. Press firmly to adhere it to the tape, but be careful not to tear the foil.
- Once the foil is in place, power on the battery-operated light and place it inside the jar.
- Turn off the lights or move to a dark area to enjoy your magically starry night.
For extra fun, here’s a demonstration YouTube video, though it doesn’t include using a constellation chart.
Middle School Project: LED Constellation Wall Art
The original inspiration for this project is taken from Just Add Flair. This is honestly a brilliant idea and it turned out beautifully! Though she used the watercolor section for her kindergarten class, the project from start to finish will definitely be a good challenge for your middle schooler.
Supplies:
- 4” x 6” watercolor paper (one for each constellation you’d like to make).
- Liquid watercolors in blue, black, and purple.
- Salt for sprinkling.
- Star stickers
- Constellation templates
- 24” x 30” painting panel
- Power screwdriver with a drill bit.
- String of battery-operated LED lights.
- Hot glue gun
- Hole punch
- Velcro stickers
- Silver metallic marker
- Sandpaper
Process:
- Print the constellation template cards to match the same size as your watercolor paper cards.
- Hole punch the stars in each constellation.
- Lay each constellation template over a watercolor paper card. With a pencil, make a mark for each star on the watercolor paper. Place a star sticker over each pencil mark on the watercolor paper.
- Paint the watercolor sheets as desired, and sprinkle on the salt at the end for texture.
- Once the watercolor is completely dry, carefully peel off the stickers to leave behind the star shape.
- With the silver marker, draw in the lines for each constellation.
- Using the hole punch, create holes in the center of each star. This is where the LED lights will poke through.
- Arrange the design layout of the watercolor cards on the painting panel. Feel free to paint the panel for a greater aesthetic effect.
- Once card placement is finalized, mark where to drill for each star (through each hole punch).
- Drill a hole through each mark.
- Sandpaper the front and back for a smooth finish.
- With the strand of LED lights, poke each light through the back. Once you finalize the placement of the lights, glue them in with the hot glue gun.
- Glue the watercolor constellation cards over the lights on the front.
- Attach the battery pack to the back of the panel with Velcro stickers for easy battery replacements.
- Power on the LED lights, turn off the room lights, and enjoy your starry artwork!
High School: Fiber Optics Constellation
We found this project via Love to Know and fell in love at first sight! This is the perfect STEM challenge for your high schooler. Not only will it involve their engineering thinking process, but the outcome of the constellation is worth the effort. Not many teens can say they have made one of these illuminators!
Supplies:
- 1/4 Watt resistor
- Battery pack with wires
- Batteries for the battery pack
- Five-millimeter LED light
- Insulated alligator lead wire
- Small shipping box
- White marker or crayon
- Scissors
- Double-sided tape or sticky foam
- Black foam board
- Thumbtacks
- Printable star chart
- Plastic fiber optic strands
- Glue
- Zip tie
Process:
- Cut both ends of the resistor in half.
- Connect one end of the resistor to the red wire of the battery pack.
- Connect an Alligator lead wire to the other end of the resistor.
- Bend the ends of the LED bulb to form a 90-degree angle.
- Connect one end of the bulb to the black wire connecting to the battery pack and the other end to Alligator wire to form a circuit.
- Put the batteries into the battery pack and turn it on.
- If the light does not turn on, check to make sure the batteries are in the correct position or swap the wire leads on the light bulb around.
- Use a small shipping box to make the illuminator. Cut three tabs on the left side of the bottom of the box. The first tab should have a small hole where the light bulb will rest. (See the video linked below for the correct position.)
- The second two tabs should have a small notch where the fiber optics will sit.
- Use two pieces of double-sided tape or sticky foam to secure the battery pack inside the illuminator box.
- Using two additional pieces of tape on the back wall of the illuminator box, stick the resistor to the tape.
- Place the LED light bulb in the hole of the first tab.
- Place a printable star chart on top of a piece of black foam board.
- Use a thumbtack or other sharp object to make holes where the stars are located in the constellation.
- Trace the constellation on the black foam board with a white marker or crayon.
- Thread a single fiber optic strand through each of the star holes from the front.
- Pull the strands all the way through the holes until it is even with the foam board.
- Glue each strand in place from the back. Wait at least two hours or until the glue is dry.
- Once the fiber optic strands are dry, gather them into a single strand or bundle and loop a zip tie around them about an inch from the end.
- Glue the zip tie to the fiber optic bundle.
- Once the glue is dry, trim the end of the fiber optic strands and the tail of the zip tie.
- Guide the fiber optic bundle into the tabs of the illuminator box in front of the LED light bulb.
- Place the black foam board in front of the illuminator board and see your constellation light up.
Again, here is a YouTube video for reference. Please note that the demonstration uses a kit rather than starting with a shipping box.
K12 is a fantastic option for accredited and tuition-free online education! Enjoy the freedom of public school from the comfort of your own home. With state-certified teachers and personalized learning, K12 is committed to your student’s success!
![]()

Courtney Newman
Courtney Newman is a homeschooled graduate with a love for writing. She is currently pursuing her undergraduate degree in Health Science at University of the People. Other than writing, her hobbies include reading, yoga, visiting the beach, and meditating. She lives with her husband and pets in coastal Virginia.
Latest Posts


Guest Post by Gabriel Morse For several years, I sat for long hours every day behind one of those battleship gray desks in a windowless, dull, gray office. The pay was enough to take care…
Read more >

This post is sponsored by Little Monsters Universe. I'm Tina Salmanowitz, an advocate for homeschooling and science education. With over a decade of experience as a science educator (in class…
Read more >

This post is sponsored by Time4Learning. Before the pandemic, it was business as usual for Boca Raton resident Nikki Warris. Her two daughters, 5-year-old Natalie and 8-year-old Lexi were…
Read more >