
Looking for a patriotic high school STEM or STEAM experiment for May? This month in our STEM science projects series, we’ve decided to focus on and learn more about electricity as a conductor and as an insulator. The result? A super-cool flag that really lights up!
Background: Conductors and Insulators
Ever wonder just what really happens when you walk into a room and hit the light switch? You may never think about it, but a flow of electricity must happen for the light to brighten the room. Just what causes electricity, though, and is there a way to alter it?
Materials are classified as either electrical conductors or insulators. Conductors allow electricity to flow freely while insulators do not. Essentially, electricity flows through conductors but it’s halted when it hits insulators. Conductors allow electrons to move without reservation but protons must stick to other protons and neutrons in the nuclei. Since metals can easily gain or lose electrons, they’re considered the best conductors of electricity. Some materials may be classified as insulators but given the right amount of conductive materials, they become conductors. For instance, ceramic is a great insulator but if it’s tainted with conductive materials, it becomes known as a “superconductor” because it moves electrons very freely.
Silver is the best conductor of electricity. However, because of its expense and the fact that it tarnishes, it’s not the 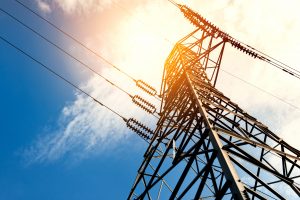 most desired. Next to silver, other metals are preferred such as gold, copper, aluminum, and mercury but even more objects are capable. Even dirty water and lemon juice can be conductors of electricity!
The shape and size of the materials matter as well. A thick piece of metal conducts electricity better than a thin piece of metal the same length. Similarly, if two conductors are the same thickness but vary in length, the shorter material will conduct better because there is less resistance (less material). Materials that have a very high resistance can work well as insulators, though.
In any electric circuit, you’ll need a combination of conductors (to transfer electricity) and insulators (to keep the conductors from bumping into each other). For this homeschool STEM project, you’ll need a conductor, an insulator, and some “art” dough for decoration along with a few other materials.
Materials:
-Conductor Dough (see instructions below)
-Insulator Dough (see instructions below)
-Art Dough (for all other purposes)
–10mm diffused lens LED lights (about 12)
-A straw
–Battery pack with leads
Instructions for Creating Dough:
With this STEM science project, it’s a good idea to have three different colors of dough – which is perfect since you need three different types of dough! We’d recommend using blue as your conductor dough, white as your insulator, and red to finish decorating the flag. Should you decide to alter colors, just make sure you keep track of which dough is your conductor and which one is your insulator. This will be critical when working to prevent conductor pieces from touching each other.
Conductor Dough:
In a medium-sized pot, mix together 1C water, 1C of flour, ¼-C salt, 3T cream of tartar, 1T vegetable oil, and blue food coloring. Cook over medium heat, stirring continuously until the mixture forms a ball in the center of the pot. Remove from heat and transfer dough to a well-floured surface. (Since the dough will be very hot at this point, it’s a good idea to spread it open and let it cool for a few minutes before handling it.) Store in an airtight container for up to three weeks.
Insulator Dough:
In a large bowl, stir together 1C flour, ½-C sugar, and 3T vegetable oil. Once mixed together well, slowly stir in ½-C distilled water by adding it 1-2 tablespoons at a time. After all water has been incorporated, you should have a crumbly dough in front of you. Pull all pieces together to form one large clump, then work in ½-C of flour, kneading it in a little at a time. Store this mixture in an airtight container.
Depending on the size of your flag, you may be able to split the white dough in half and simply work in some red food coloring (this will be your “art” dough). Alternatively, you could make a second batch of insulator dough and dye it red so you have three colors.
Instructions for the Flag:
After you’ve made the dough, you’re ready to begin constructing your light-up flag!
- Roll the blue and white dough out and cut two 3”x3” squares from the blue dough and one 3”x3” square from the white dough.
- Position your LED lights in one of the blue squares by pressing them gently into the dough.
- With a straw, poke holes in the blue dough by using the indentations left from pressing gently as your guide.
- Place an LED light into each hole and bend the longer end of each light into the dough.
- Lay a piece of white (insulator) dough on the bottoms of the lights.
- Arrange the second blue square on top of the white square.
- Turn the blue squares over and wrap a piece of white dough around the outer edges of the white layer. This step is important; it prevents the blue pieces of dough from touching each other.
- Roll out a red rectangle cutting away the section for the lights and press into the blue/white slab so they stay connected.
- Attach the power source by sticking the red wire into the top blue dough and the black wire into the bottom blue dough for the lights.
Electricity is the result of a conductor and insulator coming together to create a circuit that propels electrons to move. This month, we hope you’ll enjoy this artistic take on a light-up flag that’s both educational and pretty cool to watch!

Tasha Swearingen
Tasha is a homeschooling mom to 5 and has been homeschooling for 14 years. Currently, her children's ages span from toddler to young adult. Tasha has a Bachelor's of Science degree in Social Sciences from Florida State University and is working on her MBA through SNHU/Berklee School of Music.
Latest Posts


While nearly every college and university today is eager to accept homeschooled students into their institutions, homeschooling families need to understand that their student’s application…
Read more >

Guest Post by Gabriel Morse For several years, I sat for long hours every day behind one of those battleship gray desks in a windowless, dull, gray office. The pay was enough to take care…
Read more >

This post is sponsored by Little Monsters Universe. I'm Tina Salmanowitz, an advocate for homeschooling and science education. With over a decade of experience as a science educator (in class…
Read more >